
Kids love weaving, here is a fun twist on the idea!

Make your Loom
- Trace a circle on a piece of cardboard. (Ours are about 6.5" in diameter).
- Cut it out.
- Mark your notches fairly evenly around the edge of the circle. Use an even number of notches. (On ours we did 14 notches roughly 1.5" apart)
- snip the notches about 1/4" deep.
- Take your string and start it in the back of your circle. This string is known as your Warp String. Wrap it through the first notch and then across the circle face to the notch directly opposite it.
- Wrap around the back and go through the notch next to your starting place. Cross over your first string and pass through the next notch on the opposite side . You should have an "X" shape.
- Continue wrapping your string in this manner, moving one notch over each time.
- When you finish both tails (ends) should be on the back of your circle. Tape them down.

Time to Begin Weaving
- Choose a color of yarn and cut a length about arms length or a little longer.
- Tie it to the center where all of your strings cross.
- Begin weaving your yarn, known as your Weft String, by placing your yarn under the first string. Then over the next string. Continue alternating as you work around the circle, clockwise.
- When you reach the end of your yarn you can tie it off and tuck the end under the woven area in the center.
- To add yarn simply tie a new length on where you left off and continue weaving.

Alternate ideas
- Consider changing colors of yarn when you reach the end of one piece.
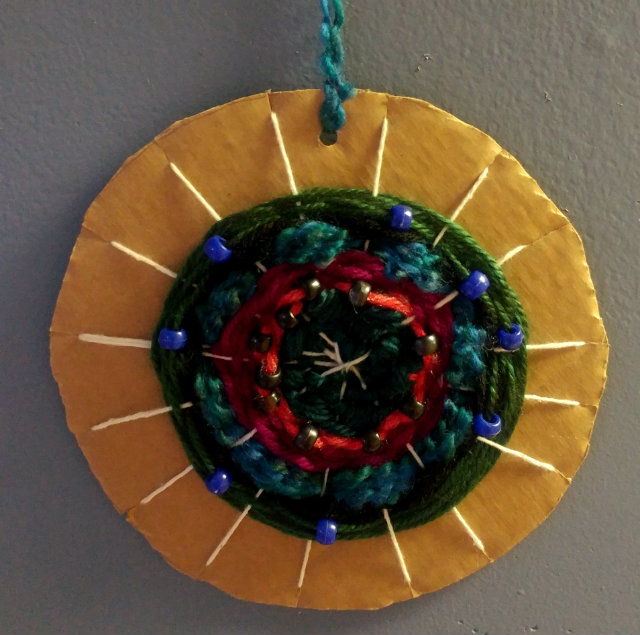
- Try adding a few beads as you go for added texture and visual interest. Simply string a bead on your yarn (weft string) and place between two of your warp strings , then continue weaving in the same manner as before.
- Consider changing direction with each new Weft String you add. For instance, If you previously went under a string this time you will go over it and under the next one... This just changes the pattern of your visible Warp Strings.


I hope you have fun with this project. I recently did this with three of my kids classes and it was so much fun. the kids all had a blast and the projects turned out so cool!
If you create this project I would love to know how yours turned out. Leave a comment below!


0 comments