

- Watercolor Paper
- Watercolor Paints and Brush
- Painters Tape
- Rubber Cement
- Black Ultra Fine Tip Sharpie
- Hair Dryer (If you are impatient like me)
Step 1

Use Painters tape to tape your paper to your work surface. This will help keep your paper from warping as much, and it will create a nice finished looking border edge around your finished piece.
Now drizzle rubber cement across your page. Let it dry.
Step 2
You will be working with three colors for this project. I would suggest using colors in the same color family to avoid mixing brown unintentionally.
- Warm colors: Red, Yellow, Orange
- Cool colors: Blue, Purple, Green
- Analogous Colors: (Colors that are next to each other on the color wheel) such as Blue, Green, Yellow
Tip: Colors that are opposite tend to make a muddy brown hue such as red and green or purple and orange...
Begin painting with the lightest color of the three you have chosen for your piece. So if you chose blue, yellow, and green, begin with the yellow.
Paint with your first color across part of your page. Leave some white space for the other colors later. Allow the paint to dry (Use a hair dryer is desired).
Step 3
Drizzle more rubber cement across your painted surface. Dry
Step 4

Paint with the second color. Paint across some of the white space you left previously but leave some white space for your third color as well. With the second color paint over part of your first color, allowing the two colors to mix and layer. Dry.
Step 5
Drizzle more rubber cement across your newly painted surface. Dry.
Step 6

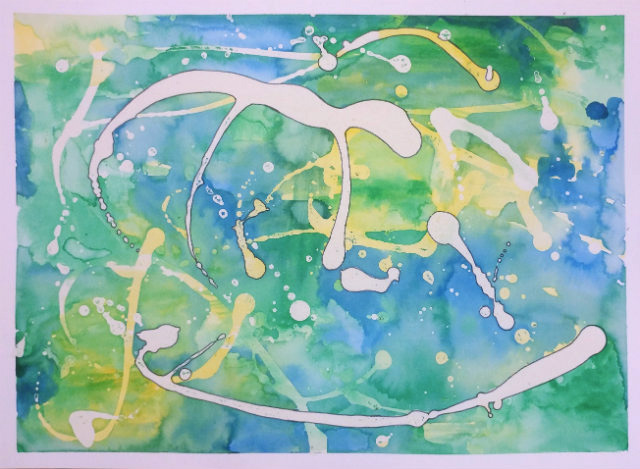
Paint with your third and final color. Fill in the remaining white space. Paint over portions of your first two colors allowing the colors to mix and layer. Leave some of the colors unmixed as well. Once your are happy with your composition allow your work to dry completely. You can use the dryer for this as well, but make sure to dry it completely.
Step 7

Using the pads of your fingers rub off all of the rubber cement, revealing the colors/white page beneath. This process takes a bit of patience and elbow grease!
Step 8

Use your sharpie pen to outline some of the shapes created by the rubber cement resisting the paint. This will simply highlight some of those shapes. You do not need to highlight all of the shapes. Simply pick a few of the most interesting to you!
Step 9
Pull up the tape revealing the crisp edges of your finished piece of abstract art. Enjoy your masterpiece!
This project is suitable for adults and children alike. Check out the beginning stages from my after school painting class for kids ranging in age from 6-11! They are doing such a fantastic job. I can not wait to see how the turn out next week when we wrap them up!


0 comments